Building ofLive: Interacting between JavaScript and C code

I recently released ofLive, a tool embedding the Emscripten version of OpenFrameworks and binding it to an HTML5 code editor (in this case ACE).

One of the main challenge I encountered when building the application was how to communicate between Emscripten generated code and regular JavaScript. In this post, I will briefly explain how to create an Emscripten library that allow that.

To build ofLive, I used the following C++ libraries:

I also created a small website using PHP/MySQL, see the source in the ofLive repository.

Building a library, the basics

To build a JavaScript library for Emscripten, I first started with a base template:

var LibraryOfLive = {
    $OFLIVE: {
     },

     editor_init: function()
     {
     },
}

autoAddDeps(LibraryOfLive, '$OFLIVE');
mergeInto(LibraryManager.library, LibraryOfLive);

The $OFLIVE array is where you put all the content you need to access outside of Emscripten, you can put for example function pointers that will allow you to call C code directly from JavaScript. The editor_init function will be registered by Emscripten at compilation time, so you can call it from c to invoke JavaScript code. It’s important to note that this function must have a corresponding declaration in the C code. Here’s the header corresponding to this library :

#pragma once

extern "C" {
	//functions calling javascript library from c
	extern void editor_init();
}

The function signature in C must reflect the function signature in JavaScript. Now let’s add another function to our library, this time we will add a C function that we can call from JavaScript. Here’s the edited library code:

var LibraryOfLive = {
    $OFLIVE: {
        backend_loadlua: null,
     },

    editor_init: function()
    {
        //bind c glue functions
        OFLIVE.backend_loadlua = Module.cwrap('backend_loadlua','number',['string']);
    },

}

autoAddDeps(LibraryOfLive, '$OFLIVE');
mergeInto(LibraryManager.library, LibraryOfLive);

Here, we basically use Module.cwrap to search for a C function named ‘backend_loadlua’, the other parameters allow us to specify the return type (number in this case) and the list of parameters the C function has (here a single string parameter). We also set our backend_loadlua JS function pointer in the $OFLIVE array with the result returned by Module.cwrap, so that we can call this function in JavaScript this way

OFLIVE.backend_loadlua('here lua code')

At last, we must obviously implement this function in our native code, here’s the updated header:

#pragma once

extern "C" {
	//functions calling javascript library from c
	extern void editor_init();

	//functions calling c code from javascript
	int backend_loadlua(const char* scriptcontent_from_js);
}

then the definition of the function:

int backend_loadlua(const char* scriptcontent_from_js)
{
       std::string script_content(scriptcontent_from_js);
	ofLogError() << script_content;
}

That's it for the code part, now we need to tell the Emscripten compiler about our library and our C functions that we want to export. Use the flag "--js-library" followed by the path to your JavaScript library to embed it in the final Emscripten app. Then use the flag "-s EXPORTED_FUNCTIONS" to specify the list of C functions to export to JavaScript.

Don't forget to add an underscore in front of your function name and also to specify the main function as Emscripten doesn't add it automatically (If you forget to include it, your app won't start since it can't access the main function)


--js-library ".\library_editor.js" -s EXPORTED_FUNCTIONS='["_main","_backend_loadlua"]'

Here's the final library and header source used in ofLive:

var LibraryOfLive = {
    $OFLIVE: {
        editor: null,
        backend_loadlua: null,
        backend_newscript: null,
        backend_openscript: null,
        backend_savescript: null,
        opened_script: "",
        readonly_script: false,
     },

    editor_init: function()
    {
        OFLIVE.editor = ace.edit("editor");
        OFLIVE.editor.setTheme("ace/theme/monokai");
        OFLIVE.editor.getSession().setMode("ace/mode/lua");
        
        //mount read/write filesystem
        FS.mkdir('/oflivescripts');
        FS.mount(IDBFS,{},'/oflivescripts');
        Module.print("ofLive: Start scripts sync...");
        Module.syncdone = 0;
        
        FS.syncfs(true,function(err) {
            assert(!err);
            Module.print("OfLive: End scripts sync");
            Module.syncdone = 1;
       });
       
       //check if we load a shared script, in this case readonly mode
       if($.trim($('#share_content').text()))
       {
           OFLIVE.opened_script =  $('#name_script').text();
           OFLIVE.readonly_script = true;
           $('#save_script').attr('class','disabled_link');
           $('#shared_script').attr('class','disabled_link');
       }
        
        //bind c glue functions
        OFLIVE.backend_loadlua = Module.cwrap('backend_loadlua','number',['string']);
        OFLIVE.backend_newscript = Module.cwrap('backend_newscript','number',['string']);
        OFLIVE.backend_openscript = Module.cwrap('backend_openscript','number',['string','number','string']);
        OFLIVE.backend_savescript = Module.cwrap('backend_savescript','number',['string','string']);
        
        //custom commands
        OFLIVE.editor.commands.addCommand({
            name: 'saveScript',
            bindKey: {win: 'Ctrl-S', mac: 'Command-S'},
            exec: function(editor) {
                //check first if the script is read only and if a name exist
                if(OFLIVE.readonly_script == true)
                    return;
                
                //no name, open name input popup
                if(OFLIVE.opened_script == "") {
                     $("#save_script_name").click();
                }
                else {
                    OFLIVE.backend_savescript($('#name_script').text(),editor.getValue());
                    OFLIVE.backend_loadlua(editor.getValue());
                }
            },
            readOnly: false
        });
    },


    editor_loadscript: function(scriptptr) 
    {
        var scriptcontent = Pointer_stringify(scriptptr);
        OFLIVE.editor.setValue(scriptcontent);
    },
    
    editor_isshare: function()
    {
        if($.trim($('#share_content').text()))
            return 1;
           
        return 0;
    },

}

autoAddDeps(LibraryOfLive, '$OFLIVE');
mergeInto(LibraryManager.library, LibraryOfLive);

Small precision: you can use in your library code things like jQuery but ONLY inside a function. Also, the editor_* function are NOT available from JavaScript, only function that you want to call from C must be defined here.

#pragma once

extern "C" {
	//functions calling javascript library from c
	extern void editor_init();
	extern void editor_loadscript(const char* scriptcontent);
	extern int editor_isshare();

	//functions calling c code from javascript
	int backend_loadlua(const char* scriptcontent);
	int backend_newscript(const char* script_name);
	int backend_openscript(const char* script_name,int isExample,const char* type);
	int backend_savescript(const char* script_name,const char* scriptcontent);
}

More details about wrapping C functions are available in the official documentation.

Posted in Emscripten, HTML5, OpenFrameworks | Comments Off on Building ofLive: Interacting between JavaScript and C code

Persisting data with Emscripten

When porting your game to Emscripten, you will soon enough notice that the default virtual file system it use doesn’t persist data, everything you write in a file is lost from one session to another. Hopefully, Emscripten has a specific file system, called IDBFS which persist your data (using the HTML5 API Indexed Db). Now, it’s important to note that you have to call manually the sync operation, and also to handle the delay between the moment you call for synchronization and the moment data are effectively synchronized, since the API is asynchronous. For more details on Emscripten File System API, the official website offer a lot of informations :
Emscripten API

On my existing C games, I persist data through SQLite. The huge advantage of SQLite is that you can use SQL language to select / manage your data and take advantage of most DBMS functionalities without the need to have any kind of server running in the background, since everything in SQLite is saved on a single db file.

Using IDBFS, it’s possible to keep your entire existing SQLite management code, the only thing you need is to call Emscripten sync API when needed to persist any changes:

Initialisation of the IDBFS filesystem :

EM_ASM(
       //create your directory where we keep our persistent data
       FS.mkdir('/persistent_data'); 

       //mount persistent directory as IDBFS
       FS.mount(IDBFS,{},'/persistent_data');

       Module.print("start file sync..");
       //flag to check when data are synchronized
       Module.syncdone = 0;

       //populate persistent_data directory with existing persistent source data 
      //stored with Indexed Db
      //first parameter = "true" mean synchronize from Indexed Db to 
      //Emscripten file system,
      // "false" mean synchronize from Emscripten file system to Indexed Db
      //second parameter = function called when data are synchronized
      FS.syncfs(true, function(err) {
                       assert(!err);
                       Module.print("end file sync..");
                       Module.syncdone = 1;
      });
);

(the EM_ASM macro allow us to call JavaScript code within c)

At the first run, the “persistent_data” folder is always empty, you can’t mount a directory that is already mounted with the default virtual file system.

After synchronisation is done, you can either start using the existing files that are now into the “persistent_data” folder, or add the base data into your folder if it’s the first time a player run your game.

if(!save_mngr.ready)
{
     //check the Module.syncdone flag value
    if(emscripten_run_script_int("Module.syncdone") == 1)
    {
         //check that our base SQLite data exist, if not copy it 
        //in the "persistent_data" folder
        FILE* file = fopen(save_path,"r");

       if(file == NULL)
       {
           logprint("save.db file doesn't exist in file system, copying it...");
           size_t size;
           //copy file
           //in this case I copy a base SQLite file into my persistent folder,
           // "base_data" is a folder in the default Emscripten file system
           unsigned char* buffer = get_resx_content(&game_state->resx_mngr,"/base_data/save.db",&size,NULL);

           file = fopen(save_path,"w");

           fwrite(buffer,sizeof(unsigned char),size,file);
           fclose(file);

           //persist Emscripten current data to Indexed Db
           EM_ASM(
                  Module.print("Start File sync..");
                  Module.syncdone = 0;
                  FS.syncfs(false, function(err) {
                                    assert(!err);
                                   Module.print("End File sync..");
                                   Module.syncdone = 1;
                                   });
            );
        }
        else
        {
            fclose(file);
        }

        save_mngr_init(&save_mngr,save_path); //here I load my SQLite file like usual and start using it, the save_mngr.ready flag is now set to true
    }
    else
    {
        return; //I prevent any further code to run as long as the save data are not ready
    }
}

(the save_mngr function is the object that handle all my save data using SQLite)
(this code is put at the beginning of my gameloop function, since you have to wait for data to be synchronized, and that there is no proper way of waiting for code execution with Emscripten (the same way sleep() or a while loop would do on desktop versions))

After that, you can persist any changes to your SQLite file with this code, for example after any data insertion or data update :

EM_ASM(
        //persist changes
        FS.syncfs(false,function (err) {
                          assert(!err);
        });
);

and that’s all! The initialisation code will then load the modified SQLite data next time the player run the game. It’s possible to check Indexed Db content afterwards with Chrome, go to Developments tools > Resources tab > Indexed Db.

Posted in Emscripten, HTML5, WebGL | Comments Off on Persisting data with Emscripten

Porting a complete C game engine to html5 through Emscripten

While I used Windows / Visual studio for porting my game engine, pretty much all advices listed here are valid for other platforms.

Tools used

  • Emscripten 1.27.2
  • emsdk for Windows
  • Emscripten Visual studio 2010 plugin
  • Chrome / Firefox for testing

If you never installed Emscripten before, go to the official website and follow the instructions described here:

Emscripten website

Important stuff before attempting a port

The most important thing to do before porting your engine to Emscripten is to make it cross-platform. Emscripten use clang to compile c code, which could be considered as a drop in replacement for GCC. It is also POSIX compliant, so if your base code is Windows only, it’s probably better to make it cross-platform first.

Things that DON’T WORK under Emscripten :

  • Threads, so if you have some background resources loading, you will need to adapt / rework this portion of code, You can use web worker as a work around, but that won’t give you a fully fledged threading support
  • plug-in system through dlopen / dlsym
  • dynamic linking, every library must be compiled as a static LLVM bitcode file (.bc) and linked when you compile you game

That’s the stuff I ran into / noticed when porting my engine, there is more limitation to be aware of, for more details, see the porting guidelines on Emscripten website:

Porting guidelines

Which libraries I used in my C engine

These are the libraries that the desktop / mobile version of my engine use, Almost all these libraries worked through Emscripten with minor changes or were already included in Emscripten. Some still require specific configuration / build flags.

  • glfw 3 (input / window management)
  • chipmunk 6.2.1 (Physics)
  • freetype 2.4.11 (ttf fonts support)
  • lua 5.2.3 (Scripting)
  • libogg 1.3.2 (Ogg decoding)
  • libpng 1.6.2 (png image support)
  • libvorbis 1.3.4 (Vorbis decoding)
  • libsndfile 1.0.25 (Reading sound files)
  • protobuf-c 0.15 (For custom binary file type like level data)
  • sqlite 3 (file based SQL database, used for save files and localization files)
  • libzip 0.11 (Reading zip archives)
  • zlib 1.2.8 (Decoding zip)
  • portaudio v19 (Playing audio content)

Porting libraries

All libraries are compiled as LLVM static bitcode (.bc file) it’s these files you provide to your game as input libraries when you will finally build it.

GLFW
Emscripten include glfw 2 and 3, so you don’t need to port it. Just compile your game with the option “-s USE_GLFW=3” (or 2 if your using GLFW 2)

Chipmunk
Chipmunk “almost” work out of the box, I made a specific patch to fix a bug I got with it.

The main bug with chipmunk / Emscripten is located in cpHashSetEach.c, emscripten doesn’t like the cpHashSetIteratorFunc function pointer and crashed for me right away. I fixed that by creating a specific cpHashSetIteratorFunc, replacing the void* type with the correct struct name. It also required me to create a specific header file with the struct definition so that cpHashSetEach.c and cpBBTree.c can access it.

patch below (winmerge format)

cpBBTree.patch

cpHashSet.patch

emscripten.h

Also, It’s better to use -s FORCE_ALIGNED_MEMORY=1 in your game EMCC linker options, I tend to have random crash without.

Freetype
Work, but some fonts make the library crash (My test with a 20px font made the library crash, while 8px font work, so test it beforehand)

lua
Work only if you use LUA_COMPAT_ALL in preprocessor definitions when compiling lua. Also, you must use -s FORCE_ALIGNED_MEMORY=1 in your game EMCC linker option.

libogg
Work out of the box

libvorbis
Work out of the box

libsndfile
I changed the library code to remove all references to FLAC (I only kept oggvorbis support), just exclude flac.c from your build setup and comment all references to FLAC in libsndfile code.

You also need a specific configuration, some basic type under Emscripten has a different size that what libsndfile expect, especially off_t, here’s the modified files:

config.h

sndfile.h

Finally, open the sndfile.c file, and remove the assert in the sf_open function, (should be around line 312):

assert (sizeof (sf_count_t) == 8) ;

In our case, sf_count_t size is 4, not 8, mainly because the off_t type don’t have the same size under emscripten.

protobuf-c
Work out of the box

sqlite
Work out of the box

libzip
Compile out of the box (untested in my Emscripten setup, I use the virtual file system of Emscripten, thus no need for zip packages)

zlib
Work out of the box

portaudio
The only library I ended up dropping in favour of SDL_audio. SDL_audio is included in Emscripten and use webaudio which is the best way to have sound in your html5 game at the moment. If you already use the callback interface of portaudio the port is pretty straight forward, I ended up reusing my whole mixing callback function I used for portaudio, with some minor adjustement to take into account the difference with the SDL_audio interface.

Callback function in portaudio
static int Callback(const void *input,void *output,unsigned long frameCount,const PaStreamCallbackTimeInfo* paTimeInfo,PaStreamCallbackFlags statusFlags,void *userData)

Callback function in SDL_audio
static void sdl_audio_callback(void* userData,Uint8* _stream,int _length)

The frameCount in SDL_audio can be retrieved this way :

(sf_count_t)((_length / sizeof(Sint16)) / num_channels);

(in this case, I read sound data as short values (SInt16) just use the datatype corresponding to your case)

The output pointer translate to the _stream pointer in SDL_audio.

For the other variables like input / paTimeInfo and statusFlags, you can just use the userData pointer to pass these variables around.

Another thing to consider is the threading handling. In my original code, I used atomic variables to manage multi-threading access to the sound functions. With the Emscripten version, I replace all the atomic code with SDL_LockAudio() / SDL_UnlockAudio() . Also, my existing buffer size for audio didn’t work well, so I settled on a audio buffer of 1024 bytes (so 512 bytes per channel), which is a nice compromise between audio quality / latency. I had small sound glitch under Chrome but nothing problematic.

Porting engine

As long as your engine compile under GCC, and don’t use threading, you should be safe. The biggest part is probably the rendering code if your engine is not already compatible with OpenGL ES 2.0 (WebGL work the same way than OpenGL ES). Basically, you have to remove all Fixed function pipeline code and replace it with OpenGL core 3.0 compatible code to be compatible with OpenGL ES / WebGL, You also can’t render vertices array directly and have to use VBO for everything. If you need more info about how OpenGL 3.0 work, have a look at opengl-tutorial.org

Don’t forget that if you don’t already use shaders, you will need to write some to be compatible with WebGL. About shader port, read the next section.

A note on shaders and webgl

WebGL only support GLSL shader #version 100, so you could have to port that part of your engine.

For example this code

#version 150

in vec2 inPos;
in vec2 inTex;

out vec4 color;
out vec2 texcoord;

in version 150 become this code

#version 100

attribute vec2 inPos;
attribute vec2 inTex;
varying mediump vec4 color;
varying mediump vec2 texcoord;

in version 100.

You could probably use the preprocessor to keep everything in the same shader file (with #ifdef GL_ES for GLES/WebGL specific code)
.In my case, I preferred to have separate shaders files to properly make the difference between a WebGL shader and a Desktop PC shader.

Emscripten specific gameloop

Rather than using a while() loop, with Emscripten, you just have to use this line to setup your game main loop:

emscripten_set_main_loop(renderoneframe,0,1);

where renderoneframe is your function where all your game loop code is. For more details, see the doc on Emscripten website:

emscripten_set_main_loop

Compiling the final game code

Another thing that I had to change is how I load my game DLL. In my engine, I have a module system where through dlopen / dlsym I have access to game specific functions. dlopen / dlsym isn’t supported in Emscripten, so the solution in my case was to build a .bc library file of my game DLL, reference the library header file, link it when compiling the final application, and replace my function locating code:

Desktop version
mngr->game_init_objects = (game_init_objects_t)dlsym(mngr->game_module,"game_init_objects");

Emscripten version.
mngr->game_init_objects = (game_init_objects_t)game_init_objects;

Obviously, it’s not suitable for a more complex plugin code, so you probably need to drop / refactor from the ground up any code that use plugin in native DLL form.

Here the final linker command I used :

-s USE_GLFW=3 -s TOTAL_MEMORY=67108864 -s NO_EXIT_RUNTIME=1 -s FORCE_ALIGNED_MEMORY=1

Packaging resources

Emscripten has a virtual file system available to replace the regular file system used on desktop. It work exactly the same way with fopen / fread call, so no need to change that. You only need to package your files this way:

python \emscripten\1.25.0\tools\file_packager.py emscripten_data.data --preload assets scripts locale.db save.db config.lua > emscripten_data.js

This will generate emscripten_data.data and emscripten_data.js files. The first file contains all your data, and the second file register your game files so you can access them. In this case the directories “assets” and “scripts” as well as the files “locale.db” “save.db” and “config.lua” are packaged in the emscripten_data.data file.

It’s important to run this command directly from your expected working directory. In this case, the file locale.db will be opened this way:

fopen("locale.db","rb").

If you want to open a file in the assets directory, then use:

fopen("assets/file.png","rb").

Finally, don’t forget to add your .js file in the .html file generated by Emscripten like this:

So your game code can find packaged files at runtime.

Posted in Emscripten, HTML5, WebGL | Comments Off on Porting a complete C game engine to html5 through Emscripten

Reckpunk is out!

Reckpunk is out! you can grab it on the official website:

https://dlan.itch.io/reckpunk

A demo, as well as the game soundtrack are also available on the website, here the launch trailer, the game have quite evolved since my first post on it 😉

Posted in Reckpunk | Tagged | Comments Off on Reckpunk is out!

(2/2) Create a gameplay video : Using VirtualDub and BulkRenameUtility

I recently made a gameplay video for Reckpunk (see it here)

The gameplay sequences have been captured using the technique I described in my previous post about apitrace. Now, when making a gameplay video, you will want to include several part from the game, and to adjust the sequence based on the music and the specific moments you want to showcase. that mean you need:

  1. to select only the sequences you want.
  2. to renumber the png files of your sequences so in the end all the screencaps are in the correct order with no hole in the numbering
  3. to make transition between sequences when needed
  4. to compress the resulting video file effectively so it don’t take too long to upload to youtube and at the same time you still have the best quality.

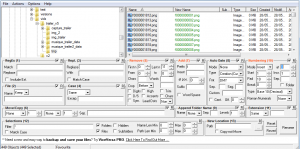
For the points 1 and 2, after deleting the file I don’t need directly in the explorer, I used BulkRenameUtility to do the renumbering, here the parameters I used to rename my png sequences :

bulkrename

Basically, you erase the whole name of every files first (“remove” groupbox), and you replace it with your own (“add” groupbox), starting with the correct number (if the previous sequence has 150 png file, you put 151 in the start value of the “numbering” groupbox.

After that, you can have the need for some transition between sequences. The most common one is the fade in effect (slowly filling the screen with a color, usually it’s black).

Virtualdub will do for that, first, open the first png file of you whole sequence, then don’t forget to set the correct framerate (Video > Framerate). For my trailer, I put 60 in source framerate, then in frame rate conversion, I put 30.

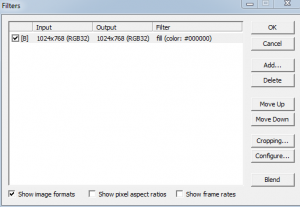
Now that the basic parameters are saved (file> save processing settings), you need to first add a filter that will fill the whole screen to black. Go to video > filter, then add the fill filter, and in configure, select the black color.

filter_virtualdub

So we have our black color, but how can we fill the screen only at selected moment? and how can we blend gradually over time the gameplay sequence with the fill color?

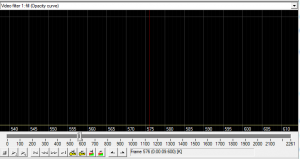
Well, let’s have a look at the curve editor, to display it, go to view>curve editor

curve_editor

As you can see, we can select in the drop down list just at the top the filter that we want to operate on(here we have the fill filter and the value we can act upon (opacity curve))

Shift+click in the black area, and a line with a point will appear.

When the line is at the top, the filter is fully active, when at the bottom, the filter is not active. The number at the bottom represent the frames of the video, you can this way precisely control the filter frame by frame.

You can shift + click on the line to add another control point. to remove it, just ctrl + click it. To move it, just click and drag the control point where you want, it.

For now, just add one control point, and move it to the bottom, so our filter is not active, this way, the windows on the right let appear our gameplay sequence one again.

Now, add a second control point at the moment where you want the screen to be full black, and move it to the top of the curve editor. You will see the line connect the 2 points, and with that, your effect will change from the moment the movie hit the frame position of the first control point to the moment when it hit the second control point, gradually filling the screen with black. You can obviously add as much control points as you need to refine the effect.

Finally, let see how we export and compress our png sequence into a avi file so we can upload it to youtube:

First, you will need the CamStudio lossless codec, since youtube will perform it’s own compression, no need to use an “aggressive” compression codec like x264, we want to keep the best quality possible. For your information, exporting the avi file uncompressed will result in HUGE file. I got something like 1.5 Go for my 1024×768 30 seconds video when I used it. After I compressed it with CamStudio codec, the size got down to 150 Mo, and the quality is roughly the same.

After installing the the codec, go to video>compress and select the CamStudio codec.

If you want to add a soundtrack, just got to audio>audio from other file, and select you music track.

Finally, just save as avi and with that, you got your video file, ready to be uploaded!

Posted in video capture | Comments Off on (2/2) Create a gameplay video : Using VirtualDub and BulkRenameUtility

(1/2) Create a gameplay video : using apitrace

A little post about using apitrace to capture gameplay sequence, the idea stem from this post http://kivy.org/planet/2011/06/recording-opengl-output-to-h264-video/

Why using apitrace rather than FRAPS or other video capture software?

 My goal was to have a free way of capturing 60 fps gameplay sequence in good quality without the need of an extra fast computer.
My biggest grip with  FRAPS  is the lack of color fidelity by default (you have an option in FRAPS to change that, but it stress even more your computer, making it extra hard to capture 60 fps sequence) and the compression algorithm which tend to decrease dramatically the quality of the end result. Having a game where graphics consist of 1 pixels borders, with lots of distinctive colors, my test with FRAPS and PlayClaw didn’t go well, and I ended up looking for a solution to output gameplay sequence directly to png files.

What is apitrace

Quoting the official site :

apitrace consists of a set of tools to:

  • trace OpenGL, OpenGL ES, Direct3D, and DirectDraw APIs calls to a file
  • replay the recorded calls from a file, on any machine and, for OpenGL and OpenGL ES, on any operating system

In short, you first create a trace file, then replay it to generate png images for each frames that you can stitch together in a software like Virtual dub

How to capture gameplay sequence

First download apitrace from the official website, http://apitrace.github.io/ in the bin folder , you will find various programs, apitrace an glretrace are the only one we will use.

Capture gameplay sequence:

apitrace trace [path to exe]

It generate a trace file in the current directory with the same name than the exe

Generate a sequence of png file:

glretrace -sr [path to trace file] --call-nos=false --snapshot-format=RGB

this generate a png file for each frame, and put it on sequential order (with the –call-nos=false option , by default, it use a generated number, thing that we don’t want to use)

Create the final gameplay video

Load the first png file of the sequence with virtual dub, since the files are in sequence, virtual dub will automatically import the whole sequence. You can also select an image in the middle of the sequence, virtual dub will load only the file numbered after the
selected file.

Don’t forget to change your source framerate, go to video > framerate and set the framerate to 60 in source rate.

If you want to generate a gif file, use Frame rate conversion, and set the value to 30 in convert fps. or use “Process every other frame (decimate by 2)” option. (the result is roughly the same, but depending of the sequence the smoothness of the exported gif could differ)

If you want to keep only a part of the image, use the null transform filter to crop the result (especially useful to reduce the size of gif)

Export to avi, and you have your video, in all it 60 fps glory! With the default parameters, you will still have a sub par result, next time, I will look into generating a HD video out of our gameplay sequence.

Posted in video capture | Comments Off on (1/2) Create a gameplay video : using apitrace

Reck punk: version 2: 2 month later

(° Ɐ°)

So, after playing around with my renderer code, and adding a D3D11 renderer to my engine, I have finally make a new version of Reckpunk! The windows version will keep an opengl renderer, but for upcoming mobile version, the d3d11 renderer will come handy.

Download ReckpunkA2 – Windows – 2.1 MBDownload

Added in this version :

  1. 10 new levels
  2. a level selector
  3. additional graphics / color scheme
  4. option to change cursor behavior (it stay fixed or follow the scrolling)
  5. slightly increase the view distance

And obligatory new screenshots:

New color scheme for tilemap
Added background animations

Next challenge is to package a linux version, I hope not in two month! 🙂

Posted in Uncategorized | Comments Off on Reck punk: version 2: 2 month later

Reckpunk : playable version

Here’s a playable version of Reckpunk:

Download ReckpunkV1 – Windows – 1.87 MBDownload

The end of november is near, so I don’t know how much I can add to this version, and if it’s worth a commercial release. Anyway, I plan to add at least background animation to liven up the levels and sounds effect, which is the thing I always do at the last time, so it should be ok 🙂

Some new screens:


Posted in Uncategorized | Comments Off on Reckpunk : playable version

October challenge => November challenge

So… October has come to an end, but my game for the october challenge isn’t finished 🙁

Since the concept work quite well, and I didn’t want to scrap what I have, I have decided to put the finishing touch to the game this november, will see where it take me. Anyway, the basics of the gameplay are implemented, I plan on having something like 20 levels.

Obligatory progression screenshots :

before death

near checkpoint

almost there!

box surfer

death

Posted in Uncategorized | Comments Off on October challenge => November challenge

October challenge!

Nothing better than starting a second game project when you already have one! My objective is to participate in Ludum dare’s October challenge, which consist in :

Finish a game — Take it to market — Earn $1

So, I have started to work on a new game, It will be a remake of reckless adventurer this time as a platformer and with controls adapted to mobiles devices. My objective is to distribute it on the playstore, the pc version should be free 🙂

I will use the engine of Token, it should allow me to accelerate the development of the game, since I already have a running android version.

Today result :

capture niveau 1

Posted in Uncategorized | Comments Off on October challenge!